
In the world of design, the right texture can mean the difference between a mediocre design and one that truly captures your audience's attention.
But texture isn't just about making your design look good; the right texture can create a tactile and visual experience that leaves a lasting impression. In fact, textures are so powerful that they can help establish a brand's visual identity, distinguishing it from competitors and making it instantly recognizable to consumers.
So, whether you're a seasoned designer or just getting started, understanding how to use the right textures is a crucial skill to have in your toolbox.
What are halftone textures?
One popular type of texture that designers often turn to is the halftone texture, aka the halftone overlay. This versatile design technique — which has since become a staple of graphic design — has been around for over a century, originating in the printing industry as a way to create the illusion of shading using dots or lines of varying sizes and spacing.
The concept is simple: the more densely packed the dots or lines, the darker the shade appears, while less densely packed dots or lines create lighter shades. To create a halftone texture, designers typically use software like Adobe Photoshop or Illustrator to manipulate the size and spacing of the dots or lines to achieve the desired effect.
There are several types of halftone textures that designers can use to achieve different effects in their designs.
Types of halftone textures
Each halftone texture is created by combining smaller elements of dots or lines in different sizes and spacing to create an overall progression. Here are three popular halftone textures:
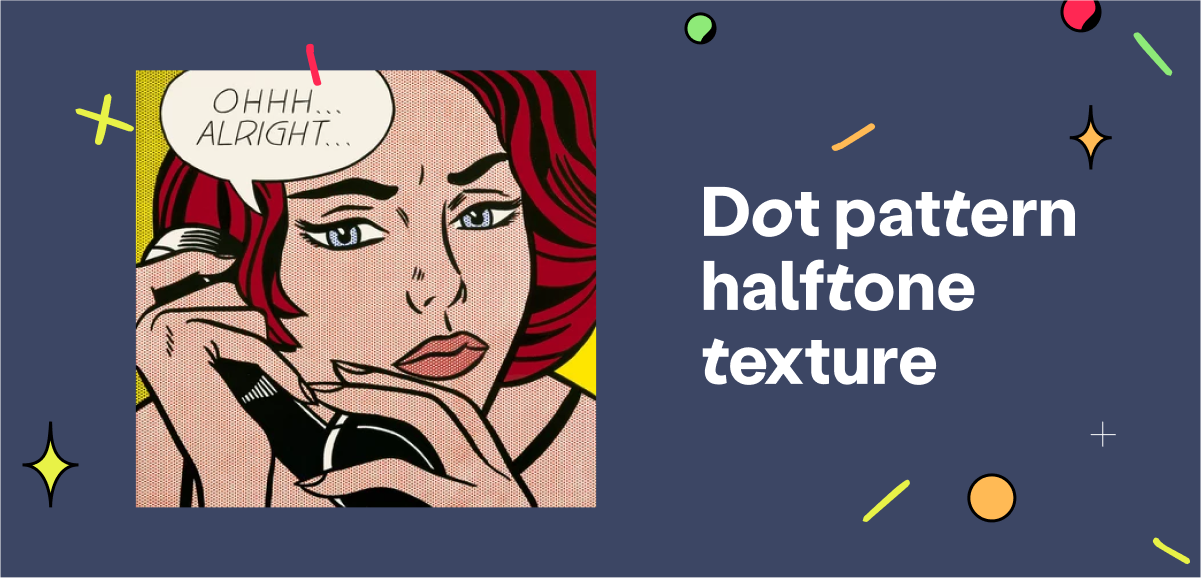
Dot pattern halftone textureDot pattern halftones are created by using small dots of varying sizes and spacing to create a textured effect. An example of this texture can be seen in the comic book style designs of Roy Lichtenstein.
Line pattern halftone
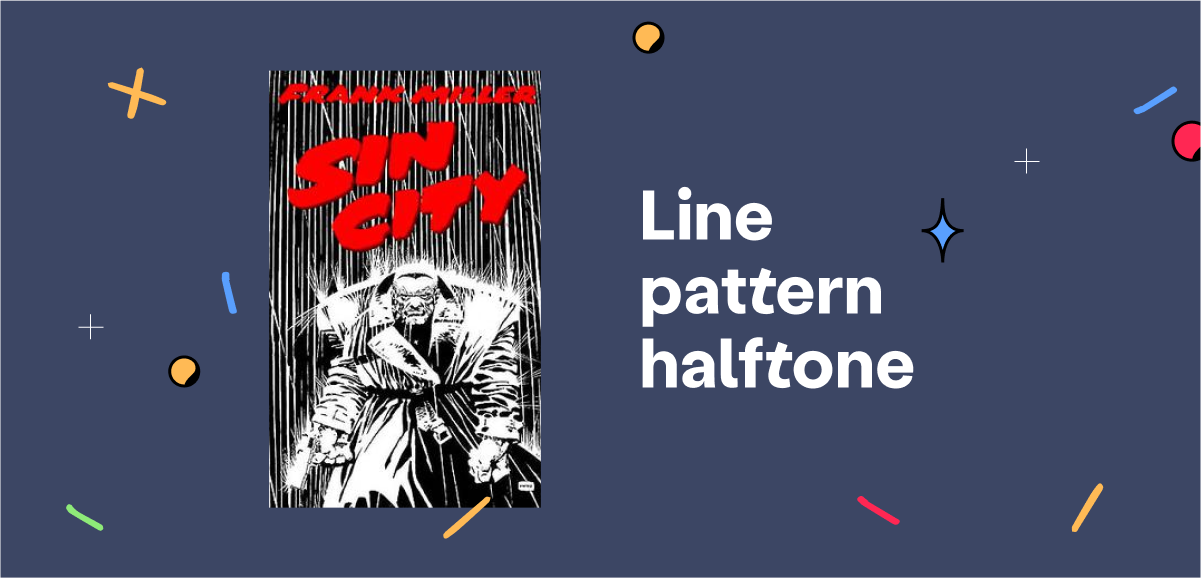
A line pattern halftone texture is created by using lines of varying thickness and spacing to create a textured effect. Line pattern halftones can be used to create a more organic, hand-drawn look, and they can be found in a variety of styles and mediums, from classic illustrations to modern graphic design and comic book art.
This texture can be seen in the work of comic book artist and writer, Frank Miller, who is best known for his work on titles like "Sin City" and "The Dark Knight Returns." His gritty, noir-influenced style often features bold line work and heavy use of line pattern halftones.
Gradient halftone
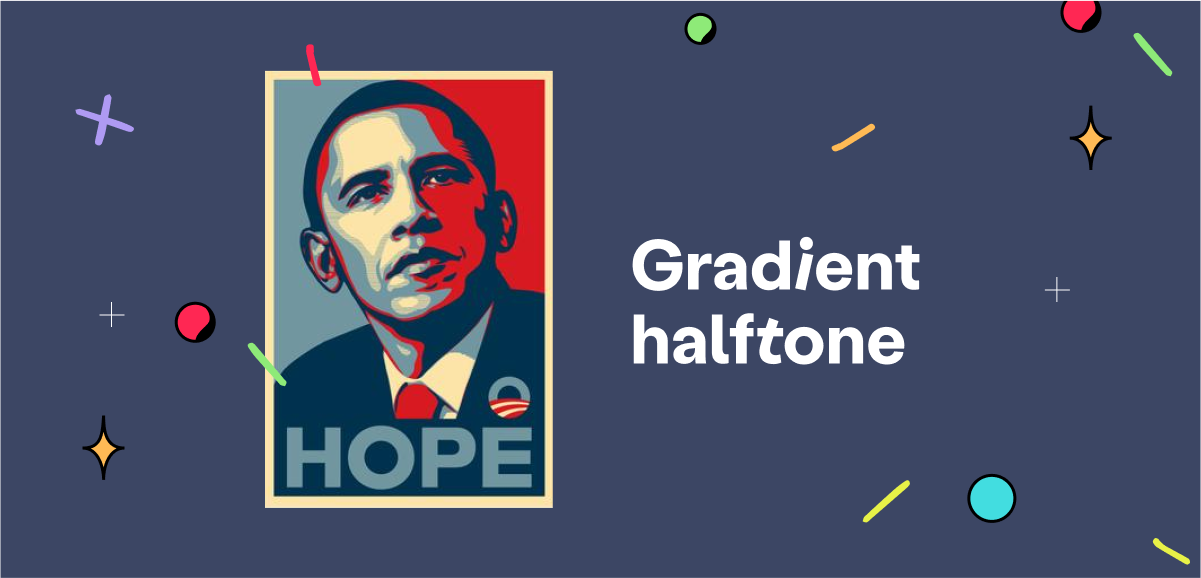
A gradient halftone texture is achieved by using dots or lines of varying sizes and spacing to create a gradient effect. Gradient halftones can be used to create a smooth, subtle transition from one color to another, and are often used in background designs and gradients.
Shepard Fairey, a street artist and designer best known for his iconic "Obey" and "Hope" posters, uses gradient halftones in his work. Fairey’s designs often feature bold colors and gradients, which are achieved using halftone effects. The use of gradient halftones adds depth and texture to his designs, making them stand out.
Creating your own halftone textures doesn’t have to be complex — it’s relatively straightforward in Photoshop. You can simply create a new layer and use the brush tool to paint dots or lines of varying thickness and spacing. You can also experiment with different brush sizes and opacity levels to achieve the desired effect.
Moreover, you have filters and adjustment layers at your disposal to further customize your texture. With a little practice, you can create unique and eye-catching halftone textures that will add visual appeal to your designs. That said, the process of creating halftone textures will largely depend on the type of texture you want to create.
How to create a halftone texture effect in Photoshop
Below are the steps you must follow to create the three main types of halftone textures in Photoshop:
How to create a dot pattern halftone overlay
- Open your image in Photoshop and duplicate the background layer
- Convert the duplicated layer to grayscale
- In the top navigation bar, go to Filter > Pixelate > Color Halftone
- Adjust the settings to your liking. You can choose between two variables — Radius and Channel — to determine how the halftone texture appears.
- Change the layer blend mode to Overlay or Soft Light
- Adjust the opacity to your liking
How to create a line pattern halftone overlay
- Open your image in Photoshop and duplicate the background layer
- Convert the duplicated layer to grayscale
- In the navigation bar, go to Filter > Filter Gallery > Sketch > Halftone Pattern
- Adjust the settings to your liking (usually a small size and high contrast works best)
- Change the layer blend mode to Overlay or Soft Light
- Adjust the opacity to your liking
How to create a gradient halftone overlay
- Open your image in Photoshop and duplicate the background layer
- Convert the duplicated layer to grayscale
- In the navigation bar, go to Filter > Pixelate > Mezzotint
- Choose a Gradient type from the options
- Adjust the settings to your liking (usually a fine or medium grain works best)
- Change the layer blend mode to Overlay or Soft Light
- Adjust the opacity to your liking
From dots to lines to grids, there is a variety of halftone patterns to choose from, making it easy to find the perfect look and feel for your design projects. To download the free texture pack and apply what you’ve learnt right away, follow the link provided below.
From dots to lines to grids, there is a variety of halftone patterns to choose from, making it easy to find the perfect look and feel for your design projects. To download the free texture pack and apply what you’ve learnt right away, follow the link provided below.
Up your design workflow with halftone textures
The right textures can bring your designs to life, but to fully realize their potential you need to have the right selection of design tools. You will not only need to choose the right platform for creating your halftone textures, but you will also need to store, manage, and present your texture-based designs the right way.
A simple cloud storage platform, such as Google Drive, may not be sufficient to achieve the latter. This is where Playbook comes in.
Playbook distinguishes itself from other cloud storage systems by emphasizing design collaboration and management. With Playbook, you can easily organize and present your work in a visually stunning and user-friendly manner; no more digging through non-visual folders. Plus, people will be able to see and appreciate your texture-based designs more easily.
See how Playbook stacks up against Google Drive and how it can help you take your design work to the next level.